Seasonal Cleaning Guides: Detailed Advice for Spring Cleaning, Winter Preparations, and More
With the changing of the seasons comes the opportunity to refresh our homes and optimize our living spaces. Each season presents unique challenges and opportunities for home care.
Let’s delve into a detailed guide for cleaning and preparing our homes for each season.
1. Spring Cleaning: A Fresh Start
- Windows: Spring is the perfect time to wash away the grime that accumulated over the winter. Clean windows inside and out. Use a mixture of white vinegar and water for a streak-free shine.
- Closet Overhaul: Swap out heavy winter wear for lighter spring clothes. Donate items you no longer wear.
- Deep Carpet Cleaning: After being trapped indoors for much of the winter, give your carpets a thorough cleaning to remove dirt and allergens.
- Outdoor Areas: Sweep and wash patios and decks. Clean outdoor furniture and prepare your garden for planting.
2. Summer Maintenance: Keep It Cool
- Air Conditioner: Before the heat sets in, clean or replace the filters of your air conditioning units. Ensure they’re working efficiently.
- Ceiling Fans: Dust them and ensure they’re set to rotate counter-clockwise, pushing cool air down.
- Refrigerator Coils: Dust and clean the coils to ensure your fridge is working efficiently during the hot months.
- Window Screens: Repair any tears to keep pests out.
3. Autumn Tidying: Preparing for the Chill
- Gutters: Clean out leaves and debris to prepare for the rainy season and prevent ice dams in colder regions.
- Heating System: Check your furnace and replace filters. Consider having it professionally inspected.
- Weatherstripping: Check doors and windows for drafts and seal them with weatherstripping.
- Garden Prep: Harvest end-of-season crops. Clear out old plants and prepare the soil with compost for the next planting season.
4. Winter Preparations: Warm & Cozy Vibes
- Chimney: If you have a fireplace, have your chimney inspected and cleaned to prevent creosote buildup and potential fires.
- Insulation: Ensure your home is well-insulated to keep warmth in and cold out.
- Pipes: Insulate pipes in unheated areas like basements or garages to prevent them from freezing.
- Emergency Kit: Ensure you have a winter emergency kit ready. It should include items like blankets, candles, matches, a flashlight, and non-perishable food.
By aligning our cleaning and maintenance routines with the changing seasons, we can not only ensure that our homes remain in good condition, but we also create spaces that are harmonious with the outside environment. Adopting a seasonal cleaning schedule allows us to always stay one step ahead and enjoy each season to the fullest. Happy cleaning!
Need a Helping Hand? Consider Hiring a Professional!
While these seasonal cleaning guides are a great roadmap to keeping your home in tip-top shape, we understand that life gets busy. If you’re feeling overwhelmed or want to ensure a thorough job, consider hiring a professional home cleaning service. They’ll have the expertise, equipment, and skills to refresh your home for every season, giving you peace of mind and more time to enjoy the things you love.
Pet-Friendly Cleaning Tips: Creating a Safe and Clean Environment for Your Furry Companions
Pets bring a lot of joy, companionship, and love to our homes. However, they also come with their own set of cleaning challenges – from pet hair tumbleweeds to unexpected messes. As pet parents, our primary concern is ensuring the cleaning methods and products we employ are safe for our furry friends. Let’s dive deep into a comprehensive guide to keeping your home clean and pet-friendly.
1. The Never-Ending Battle with Pet Hair
- Regular Grooming: The first step in controlling pet hair is regular grooming. Brushing your pet daily reduces the amount of hair shed around your home. Depending on your pet’s coat, consider investing in a deshedding tool.
- High-Efficiency Vacuum: Use a vacuum designed specifically for pet hair. These often come with specialized attachments and higher suction power to effectively remove embedded fur from carpets and upholstery.
- Microfiber Mops and Dusters: These tools are excellent for picking up pet hair on hard surfaces and are less likely to scratch your floors.
- Laundry Tips: Before washing, shake out pet bedding and toys to remove hair. Using a pet-friendly lint roller can help too. Add white vinegar to the wash for an extra boost in breaking down pet hair.
2. Addressing and Eliminating Pet Odors
- Regular Bathing: Bathing pets regularly, in accordance with their breed and health requirements, helps reduce odors. Always use pet-specific shampoos.
- Natural Air Fresheners: Opt for natural solutions like baking soda, which absorbs odors without releasing potentially harmful chemicals. Sprinkle on carpets, let sit for 15 minutes, then vacuum.
- Frequent Litter Box Maintenance: For cat owners, scoop the litter box daily and change the litter frequently. Clean the box with natural, unscented soap to avoid deterring your cat from using it.
- Clean Accidents Immediately: Accidents happen! The key is to clean them up ASAP. Use an enzyme-based cleaner, which breaks down the proteins and neutralizes odors. Always test a hidden spot first to ensure it doesn’t discolor surfaces.
3. Managing General Pet Messes
- Pet-Proof Your Home: Consider investing in durable, washable rugs and slipcovers. They can be easily cleaned and are less likely to be ruined by the occasional mess.
- Natural Cleaning Solutions: For general cleaning, a mix of white vinegar and water can be effective and safe. Another option is unscented castile soap for various surfaces.
- Stain Removal: For carpets and upholstery stains, a paste of baking soda and water can be effective. Let it sit, then vacuum or brush off.
- Chew Toy Maintenance: Clean your pet’s toys regularly. Rubber and plastic toys can be cleaned in a mixture of vinegar and water, while plush toys can typically be machine-washed.
4. Safe Cleaning Products: What to Look For and Avoid
- Check Labels: Opt for cleaning products labeled as “pet-friendly” or “natural”. Avoid those with ingredients like bleach, formaldehyde, isopropyl alcohol, and phenols.
- DIY Cleaning Solutions: Simple ingredients from your pantry, like baking soda, white vinegar, and lemon, can be effective, non-toxic cleaners.
- Safe Storage: Always store cleaning products, even natural ones, out of pets’ reach.
- Consult Your Vet: When in doubt, consult your veterinarian about specific
Our pets are a beloved part of our families. Their safety and well-being are of utmost importance. Adopting pet-friendly cleaning routines ensures that not only is our home clean and fresh, but it’s also a safe environment for our four-legged friends. And remember, while these tips provide a great roadmap, consistency in cleaning and maintenance is the key to a harmonious pet-friendly household. If overwhelmed, consider consulting or hiring professionals specializing in pet-friendly cleaning services. After all, our furry companions deserve the best!
Preparing Your Home for Special Occasions: Deep Cleaning and Organizing for Unforgettable Gatherings
Special occasions – whether it’s the holiday season, a family reunion, or a dinner party – often require extra attention to the cleanliness and organization of our homes. A spic-and-span environment not only creates a welcoming atmosphere but also allows the host to relax and enjoy the occasion. Here’s a detailed guide on how to prepare your home for those special moments.
1. Plan and Prioritize
- Checklist Creation: Write down everything that needs to be done. This can range from deep cleaning certain areas, decluttering rooms, or even purchasing additional items like extra seating or decor.
- Delegate Tasks: If you live with family or have help, assign specific tasks to each person. This distributes the workload and makes the process more efficient.
2. Deep Cleaning for a Sparkling Home
- Carpets and Rugs: Vacuum thoroughly. For a deeper clean, consider renting a carpet cleaner or hiring a professional service to remove embedded dirt and freshen up the fibers.
- Windows: Clean both the inside and outside of your windows. This allows more natural light in, making spaces feel more open and welcoming.
- Kitchen and Bathrooms: These areas often see the most traffic. Scrub counters, tiles, and fixtures. Don’t forget the inside of the oven and refrigerator, especially if you’re planning on cooking for your guests.
- Dusting: From ceiling fans to baseboards, remove dust from all surfaces. Use microfiber cloths to capture the dust effectively.
3. Declutter and Organize
- Entrance and Living Area: Clear out unnecessary items from the entrance, as this is the first impression. In the living areas, remove excess items to create open spaces for guests to mingle and relax.
- Bedrooms: If you’re having overnight guests, declutter bedrooms and ensure there’s ample space in closets or drawers for them to store their belongings.
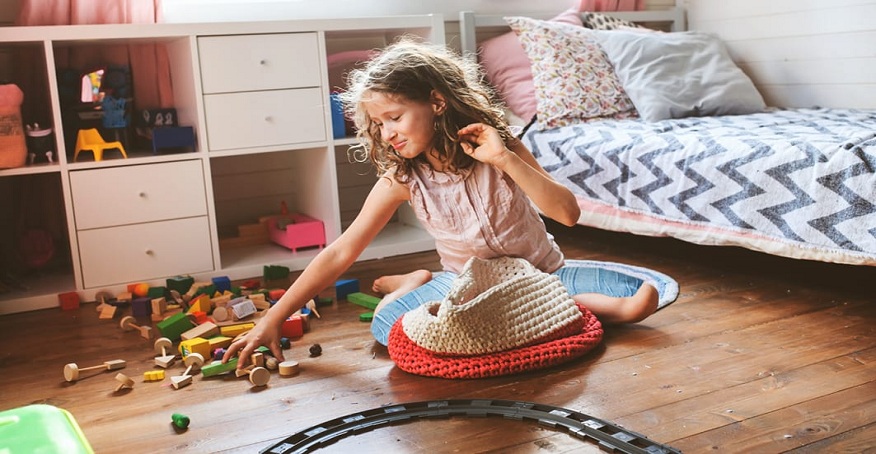
- Kids’ Play Areas: Organize and store toys in baskets or storage units. This ensures safety and creates a tidy appearance.
4. Setting the Ambiance
- Decor: Depending on the occasion, add some thematic decor to elevate the ambiance. This could be holiday-specific decorations, candles, or fresh flowers.
- Lighting: Ensure all bulbs are working. Consider adding fairy lights or dimmable lights for a cozy atmosphere.
- Music: Prepare a playlist in advance. Soft background music can set a pleasant mood for the gathering.
5. Prepare for the Unexpected
- Emergency Clean-Up Kit: Accidents happen. Keep a kit ready with stain removers, paper towels, and other quick-clean items.
- Extra Seating and Dining Essentials: It’s always a good idea to have some extra chairs, plates, glasses, and utensils on hand just in case.
- Guest Essentials: If guests are staying overnight, ensure you have fresh linens, towels, toiletries, and a designated space for them to feel at home.
Preparing your home for special occasions goes beyond just cleaning and decluttering. It’s about creating a welcoming environment where memories are made. By planning ahead and paying attention to detail, you ensure that both you and your guests have a wonderful time, free from the stress of last-minute preparations. Here’s to unforgettable gatherings in a home that’s as special as the occasions you’re celebrating!
Ready for a Hassle-Free Celebration? Consider Professional Help!
While these guidelines offer a comprehensive approach to readying your home for special occasions, we recognize that time is of the essence. Don’t let the preparation stress overshadow the joy of the event. If you’re pressed for time or simply want a flawless finish, consider hiring professional cleaning and organizing services. They’ll transform your space efficiently, giving you the peace of mind to focus on hosting and enjoying your special occasion.
All About Allergens: Deep Cleaning Homes for Improved Air Quality
Allergens, those microscopic nuisances, can turn any haven into a place of sneezing, itching, and discomfort. They lurk in the most unexpected corners, from the plush of your carpet to the unseen realms of your ventilation system. To keep your home a true sanctuary, especially for those with allergies, understanding how to deeply clean and combat these pesky invaders is crucial. This guide dives into the meticulous art of purifying your home from allergens.
1. Understanding Common Household Allergens
Before launching an anti-allergen cleaning spree, understanding common culprits is vital:
- Dust Mites: These microscopic creatures thrive in mattresses, upholstery, and carpets.
- Pet Dander: Flakes of skin shed by cats, dogs, and other furry or feathered pets.
- Pollen: Often brought indoors from open windows or clinging to clothing.
- Mold: Thrives in damp environments like bathrooms or basements.
2. Tackling Dust Mites: The Invisible Adversary
- Bedroom Rituals: Wash bed linens weekly in hot water. Consider allergen-proof covers for pillows, mattresses, and box springs.
- Carpet Care: Vacuum carpets weekly using cleaners with a HEPA filter. Consider professional steam cleaning bi-annually to eradicate mites deep within.
- Maintain Low Humidity: Dust mites flourish in high humidity. Use dehumidifiers and aim for a level below 50%.
3. Managing Pet Dander: Love Pets, Not Allergies
- Regular Grooming: Bathing and brushing pets regularly can reduce the amount of dander they shed.
- Dedicated Zones: If possible, have pet-free zones in your home, especially bedrooms.
- Air Purifiers: These can help capture airborne dander. Ensure the purifier is apt for pet allergens.
4. Pollen Prevention: Keeping the Outdoors, Outdoors
- Strategic Timing: Keep windows closed during high pollen times, typically early mornings and dusk.
- Post-Outdoor Routines: Change clothes after being outdoors. Consider showering before bedtime to wash off any clinging pollen.
- High-Efficiency Filters: Use them in your heating or cooling systems to trap pollen.
5. Mold Mitigation: Conquering Dampness
- Identify and Address: Regularly check areas prone to dampness. Address any leaks or water damage promptly.
- Bathroom Rituals: Use exhaust fans during and after showers. Frequently clean tiles and grout to prevent mold buildup.
- Basement Care: If your basement is prone to dampness, use dehumidifiers. Regularly check for mold signs and clean appropriately.
6. Overall Air Quality Enhancement
- No Smoking: Ensure your home remains a smoke-free zone. Tobacco smoke aggravates respiratory allergies.
- Houseplants: Some plants, like the spider plant or peace lily, can help improve indoor air quality.
- Regular Cleaning: Dust and vacuum at least weekly. Don’t forget vents, window sills, and other often-overlooked areas.
- Natural Cleaners: Avoid aerosol sprays and cleaners with strong chemicals. Opt for natural, fragrance-free cleaning products.
7. Investing in Quality Equipment
- Vacuums with HEPA Filters: These filters ensure that dust and small particles are trapped inside the vacuum, rather than being expelled back into the air.
- Quality Dehumidifiers: These not only deter dust mites but also reduce mold growth.
- Top-Grade Air Purifiers: Invest in units specifically designed to reduce allergens. Ensure they are the right size for your room for maximum efficacy.
Combatting allergens requires a mix of knowledge, routine, and the right tools. By deep cleaning and maintaining an allergen-reduced environment, you pave the way for better respiratory health and overall well-being for everyone in the household. And while these steps provide an effective roadmap, for those especially sensitive to allergens, seeking expert advice or services can be invaluable.
Seeking a Breathe-Easy Solution? Hire Expert Assistance!
While the guide above equips you with robust strategies, if you’re pressed for time or require a deeper cleanse, professional cleaning services specializing in allergen reduction might be your answer. They come armed with expertise and specialized equipment, ensuring a thorough purification of your living space. Explore the best allergen-reduction cleaning services in your area today, and breathe easier knowing your home is a true refuge.
Emergency Cleanup: Steps to take for unexpected messes like wine spills, ink stains, or pet accidents.
Life is full of surprises, and not all of them are pleasant. Spilled wine during a dinner party, an ink blotch on your favorite couch, or an unforeseen pet accident can all test your patience. However, with the right know-how, these messes can be tackled efficiently. Here’s a step-by-step guide to managing unexpected spills and stains.
1. Wine Spills
- Act Fast: The quicker you address the spill, the better the results.
- Blot, Don’t Rub: Use a clean cloth to blot the spill gently. Rubbing can push the wine deeper into the fibers.
- White Wine Hack: Oddly enough, white wine can neutralize red wine stains. Pour a little white wine over the red wine stain and blot.
- Salt Sprinkle: If you’re out of white wine, after blotting, sprinkle salt over the stain. Let it sit for a few hours, and it’ll absorb much of the wine.
- Rinse and Clean: Afterwards, rinse with cool water and apply a mixture of dishwashing liquid and hydrogen peroxide (3:1 ratio) if the stain persists.
2. Ink Stains
- Dab with Alcohol: Isopropyl alcohol can be effective against ink. Place a cloth underneath the stained area, apply alcohol to another cloth, and dab the stain.
- Rinse and Repeat: Rinse with cold water and repeat until the stain fades.
- Laundry Solution: For washable fabrics, after treating with alcohol, apply a bit of liquid laundry detergent and wash.
3. Pet Accidents
- Immediate Cleanup: If the mess is “solid,” pick it up with gloves. If it’s wet, blot as much as you can using paper towels or a clean cloth.
- Enzymatic Cleaners: These are designed to break down proteins, effectively removing pet stains and odors. Apply according to the product’s instructions.
- Natural Solution: If you don’t have an enzymatic cleaner on hand, mix equal parts of white vinegar and water, spray on the area, let it sit for a few minutes, then blot.
- Baking Soda Boost: After cleaning, sprinkle baking soda over the area. Let it sit overnight and vacuum the next day to remove any lingering odors.
General Tips for All Emergencies
- Test First: Before applying any solution to a visible area, test on a small, hidden spot to ensure it doesn’t cause discoloration or damage.
- Avoid Heat: Don’t use hot water or a hot dryer on stains, especially protein-based ones, as heat can set them.
- Stock an Emergency Kit: Create a kit with essential cleaning supplies like white vinegar, baking soda, dish soap, paper towels, clean rags, gloves, and a list of emergency cleaning tips.
Conclusion
While unexpected messes can be stressful, a prompt response paired with the right techniques can mitigate damage and restore your items to their former glory. Remember, the key lies in quick action, gentle treatment, and leveraging the right cleaning agents.
Need Professional Help for Stubborn Stains?
If you’ve tried everything and the stain persists, or if you’re worried about potentially ruining a valuable item, it might be time to call in the experts. Professional cleaning services have the tools and expertise to tackle even the toughest of stains. Reach out to trusted cleaning specialists in your area today and get back to enjoying your pristine home.
Beyond the Surface: Air Quality and Cleaning
In modern living environments, where we spend the majority of our time indoors, the importance of indoor air quality (IAQ) cannot be overstated. While our cleaning rituals often focus on visible surfaces, understanding and addressing the unseen particulates in our air is crucial for optimal health and comfort. Let’s explore the intimate relationship between cleaning practices and indoor air quality, emphasizing the professional solutions like air duct cleaning that can make a significant difference.
1. The Connection Between Cleaning and Indoor Air Quality
Every cleaning activity, from dusting shelves to vacuuming carpets, directly impacts the air we breathe. Left unattended, dust, mold spores, pet dander, pollen, and other pollutants accumulate, deteriorating the IAQ and potentially triggering allergies and respiratory issues.
- Dust: Comprising skin cells, fibers, and microscopic organisms like dust mites, dust is a primary indoor air pollutant. Regular cleaning can minimize its concentration, but some cleaning practices, like dry dusting, can inadvertently disperse it, temporarily reducing air quality.
- Volatile Organic Compounds (VOCs): Many cleaning agents release VOCs, which can lead to headaches, dizziness, and long-term health concerns when inhaled. Using natural or VOC-free cleaning products can help mitigate this risk.
2. The Role of Air Ducts in Indoor Air Quality
Air ducts, the arteries of our HVAC systems, play a pivotal role in maintaining a healthy indoor environment. Over time, these ducts can accumulate dust, mold, and other contaminants, which are then circulated throughout the home every time the system runs.
- Professional Air Duct Cleaning: This process involves cleaning the various components of an HVAC system, including the supply and return air ducts, registers, and grilles. By leveraging specialized equipment, professionals effectively remove accumulated debris, ensuring cleaner air circulation.
- Frequency: While there’s no one-size-fits-all answer, many experts recommend having air ducts professionally cleaned every 3-5 years. However, if you’ve recently renovated, moved into a newly constructed home, or have respiratory concerns, more frequent cleaning might be beneficial.
3. Ways to Improve Indoor Air Quality
- Routine Cleaning: Regularly dust, vacuum, and mop. Opt for vacuums with HEPA filters, which trap smaller particulates more effectively.
- Natural Cleaning Solutions: Shift towards natural or homemade cleaning solutions to reduce VOCs.
- Regular HVAC Maintenance: In addition to professional duct cleaning, changing filters routinely and ensuring the system is in top shape helps in maintaining good IAQ.
- Houseplants: Certain plants like spider plants, peace lilies, and snake plants can naturally purify air, removing contaminants like benzene and formaldehyde.
- Air Purifiers: Devices with HEPA filters can capture particles as small as 0.3 microns, including pollen, mold spores, and pet dander, further enhancing IAQ.
Conclusion
While maintaining a visibly clean home is essential, delving deeper into aspects like indoor air quality is crucial for comprehensive well-being. Through mindful cleaning practices, the utilization of natural products, and professional services like air duct cleaning, we can cultivate indoor environments that are not only clean but also health-boosting.
Considering a Breath of Fresh Air? Go Pro!
If you’re serious about enhancing your home’s air quality, consider professional air duct cleaning as a crucial step. Beyond just surface cleaning, professionals address the core of your home’s ventilation system, ensuring that every breath you take is as clean as possible. Consult with professional air duct cleaning services in your area today and take a holistic approach to home cleanliness.
Mastering the Art of Cleaning Wood Floors: Tips & Tricks for Longevity
Wood floors, with their warmth and timeless appeal, grace many homes and provide a sense of luxury and charm. However, they also require special care to ensure their longevity and maintain their luster. Here’s a comprehensive guide to mastering the art of cleaning and caring for wood floors, ensuring they remain a beloved feature in your home for years to come.
1. Understand Your Wood Floor’s Finish
Before diving into cleaning, determine the type of finish on your wood floor. Is it surface-sealed, oil-sealed, or untreated? Most modern wood floors are surface-sealed with urethane, polyurethane, or polyacrylic, making them water and stain-resistant. Knowing the finish type informs your cleaning approach.
2. Routine Cleaning: The Key to Longevity
- Soft Bristle Broom: Regularly sweep or use a soft-bristled broom to remove dust, dirt, and grit. These particles can scratch and dull the floor’s finish over time.
- Vacuum with Care: If using a vacuum, ensure it’s set to ‘hard floor’ mode. The beater bar, used for carpets, can damage wood floors.
3. Deep Cleaning without Damaging
- Avoid Excess Water: Water and wood don’t mix. When mopping, wring out the mop almost completely, ensuring it’s only damp. Standing water can warp and damage wood.
- pH-Neutral Cleaners: If your floor is surface-sealed, use a pH-neutral, water-based cleaner. Avoid vinegar or soap-based cleaners, as they can dull or damage the finish.
- Refresh Oil-Sealed Floors: For oil-sealed floors, consider a product specifically designed for such finishes. This not only cleans but also rejuvenates the oil finish.
4. Addressing Spills and Stains
- Act Quickly: Whether it’s wine or coffee, address spills immediately. Gently blot the spill (avoid rubbing) with a soft, dry cloth.
- Sticky Spots: For sticky residues, such as gum or candy, apply ice until the substance hardens. Then, gently scrape it off with a plastic scraper or credit card. Wipe with a damp cloth and dry immediately.
5. Preventative Measures for Pristine Floors
- Protective Pads: Place felt pads under furniture legs. This prevents scratches and dents when furniture is moved.
- Rugs and Mats: Use entry mats or rugs in high-traffic areas. This not only adds aesthetic appeal but also captures dirt and moisture, safeguarding your wood floor.
- UV Protection: Prolonged sun exposure can fade wood floors. Use blinds, curtains, or UV-resistant window films to protect against sun damage.
- Shoe Sense: Consider a no-shoe policy, or at least avoid walking on wood floors with high heels or damaged shoes that might cause scratches.
6. Periodic Maintenance and Refinishing
- Recoating: Over time, even well-cared-for wood floors can lose their sheen. Consider recoating every 3-5 years to renew the finish.
- Refinishing: If the wood itself is scratched or dented, a complete refinishing may be in order. This involves sanding the floor down and reapplying the finish. Depending on the wear, refinishing might be needed every 7-10 years.
Wood floors are an investment in the beauty and value of your home. With meticulous care and a commitment to proper cleaning techniques, they can remain a shining feature in your living space. Mastery in wood floor care is a blend of regular cleaning, immediate attention to spills, and periodic professional maintenance.
Seeking the Best for Your Wood Floors? Consult a Pro!
Even with impeccable daily care, periodic professional attention ensures your wood floors remain in pristine condition. From recoating to refinishing, professional services can provide the expertise necessary for the longevity of your investment. Reach out to trusted wood floor care experts in your area today to elevate your floor care regimen.
Why Grout Gets Dirty and How to Clean It: A Guide to Restoring Your Grout to Its Original Glory
Grout, the often-overlooked element between tiles, plays a critical role in giving tiled surfaces a finished look. However, over time, you might notice your grout becoming discolored, taking away from the beauty of your tiles. Let’s explore why grout gets dirty and how you can effectively restore its original hue.
1. Understanding Grout
Grout is typically a mixture of water, cement, sand, and color tint, making it porous in nature. This porosity means it can easily absorb liquids, leading to stains and discoloration.
2. Why Does Grout Get Dirty or Discolored?
- Moisture and Mold: In areas like bathrooms, grout can often become a breeding ground for mold and mildew due to constant exposure to moisture. This can lead to a dark, greenish or black discoloration.
- Dirt and Grime: In high traffic areas, such as hallways or kitchen floors, dirt and grime from shoes and spills can get embedded into the grout, causing it to darken.
- Spills: Colored liquids like wine, coffee, or juice can cause noticeable stains if not cleaned up promptly.
- Improper Cleaning: Ironically, the very act of cleaning tiles can sometimes make grout dirtier. When you mop, the dirty water can settle into the grout lines, leading to discoloration over time.
- Aging: Just like any other material, grout can undergo wear and tear, leading to natural discoloration as it ages.
3. Cleaning and Restoring Grout
- Routine Maintenance: Regularly wipe down tiled surfaces with a damp cloth to prevent dirt buildup. In wet areas, like bathrooms, ensure good ventilation to reduce mold growth.
- Natural Cleaning Solution: Mix equal parts of white vinegar and warm water in a spray bottle. Spray on the grout, let it sit for a few minutes, and then scrub with a stiff brush. Rinse with water. (Note: Avoid vinegar on natural stone tiles like marble as it can cause damage.)
- Baking Soda and Hydrogen Peroxide: For tougher stains, create a paste with baking soda and a little water. Apply to the grout and then spray with hydrogen peroxide. After a few minutes, scrub and rinse.
- Commercial Grout Cleaners: There are many grout cleaning products available on the market. Always read labels, follow instructions, and test a small hidden area first.
- Steam Cleaning: A steam cleaner can be an effective and chemical-free way to clean grout. The high-temperature steam breaks down grime and dirt, making it easier to scrub away.
- Sealing Grout: After cleaning, consider sealing the grout. Sealants can prevent moisture absorption and reduce the likelihood of future staining.
4. When to Seek Professional Help
Sometimes, despite your best efforts, grout may remain stubbornly discolored. In such cases, professional tile and grout cleaning services can be beneficial. They come equipped with specialized tools and cleaners that can often achieve more significant results than home cleaning.
Grout, while small in size, can significantly impact the overall appearance of tiled surfaces. By understanding what causes its discoloration and adopting effective cleaning practices, you can ensure that your grout—and by extension, your tiles—remain in impeccable condition for years to come.
Seeking a Spotless Finish? Consult the Experts!
If your grout remains stained or you’re aiming for a thorough, deep-clean finish, consider professional grout cleaning services. They bring expertise and advanced equipment to the table, ensuring your tiled spaces look as good as new. Reach out to top grout cleaning specialists in your area today for a sparkling transformation.
Upholstery Cleaning Mistakes to Avoid: Safeguarding Your Furnishings
Upholstery lends texture, color, and comfort to our living spaces. Yet, when it comes to cleaning, many well-intentioned efforts can end up causing more harm than good. Recognizing and avoiding common upholstery cleaning mistakes can ensure that your furniture retains its beauty and durability. Here’s a guide to the pitfalls you should be aware of.
1. Not Checking Cleaning Codes
Every piece of upholstered furniture typically comes with a cleaning code. This code, often found on labels or tags, provides guidelines on what cleaning solutions or methods to use.
- Mistake: Using a one-size-fits-all cleaning approach without checking the code.
- Solution: Familiarize yourself with the different codes (e.g., W for water-based cleaners, S for solvent-based cleaners) and always check before proceeding.
2. Over-wetting the Fabric
Upholstery isn’t designed to get soaking wet, and excessive moisture can damage its fibers, cause shrinking, or create a mold/mildew issue.
- Mistake: Using too much water or liquid cleaner.
- Solution: Always use a damp cloth or sponge, never a wet one. If using a cleaning solution, test in a hidden spot first.
3. Scrubbing Stains Aggressively
A common instinct is to scrub vigorously when a spill occurs. However, this can push the stain deeper into the fabric or cause damage.
- Mistake: Rubbing or scrubbing stains with force.
- Solution: Gently blot spills with a clean, white cloth, working from the outside of the stain inward to prevent spreading.
4. Using Harsh Chemicals
Some chemicals can damage upholstery fabrics or cause discoloration.
- Mistake: Reaching for bleach or other strong chemicals in an attempt to remove stubborn stains.
- Solution: Stick to gentle, upholstery-friendly cleaners. Natural solutions, like a mix of water and mild dish soap, often work wonders.
5. Not Vacuuming First
Dirt and dust can get embedded into the fabric, and if you wet the upholstery without removing them, it can create a muddy mess.
- Mistake: Jumping straight to wet cleaning methods.
- Solution: Always vacuum upholstery thoroughly before applying any cleaning solutions.
6. Skipping Regular Maintenance
While addressing spills and stains is crucial, regular maintenance is equally vital for the longevity of your upholstery.
- Mistake: Only cleaning upholstery when it looks dirty.
- Solution: Incorporate a routine of regular light cleaning, such as weekly vacuuming and periodic professional cleanings, to keep your upholstery in peak condition.
7. Not Protecting Upholstery After Cleaning
After cleaning, upholstery can be more vulnerable to stains and wear, especially when it’s still a bit damp.
- Mistake: Using the furniture immediately after cleaning.
- Solution: Allow the upholstery to dry completely after cleaning. Consider using protective sprays designed for upholstery to provide a barrier against future stains.
Proper upholstery cleaning is more of an art than a simple chore. By being informed about the common mistakes and their solutions, you can ensure that your furnishings remain vibrant, comfortable, and long-lasting.
Need Expert Care for Precious Upholstery? Seek Professional Help!
Even with the best intentions and utmost care, upholstery can sometimes benefit from professional attention. Whether it’s a stubborn stain, delicate fabric, or simply a desire for a deep clean, professional upholstery cleaners have the skills and tools needed. Connect with trusted upholstery cleaning experts in your area today to give your furnishings the treatment they deserve.
Tackling Tough Stains on Car Upholstery: A Comprehensive Guide
Cars often double as dining rooms, makeup stations, and even play areas. As such, stains on car upholstery are almost inevitable. Whether you’re dealing with coffee spills from that morning rush or crayon marks courtesy of a little artist, this guide provides targeted solutions for fabric, leather, and synthetic car seat materials.
1. Fabric Car Seats
- General Stains: Begin by vacuuming the seat to remove any loose debris. Mix a solution of equal parts water and mild dish soap. Dab a cloth into the solution and gently blot the stain. Rinse the cloth with clean water and blot again to remove the soap. Pat dry with a towel.
- Oil or Grease Stains: Sprinkle cornstarch or baking soda on the stain and let it sit for 10 minutes. This will absorb much of the grease. Vacuum it up and then use the general stain method above.
- Ink Stains: Dab a bit of isopropyl alcohol onto a cloth and gently blot the stain, moving from its edges to the center.
- Coffee/Tea Stains: Blot with a solution made of equal parts water and white vinegar. After cleaning, blot with fresh water to rinse.
2. Leather Car Seats
- General Stains: Use a pH-balanced leather cleaner. Dampen a cloth with the cleaner and wipe the seats. For tougher stains, let the cleaner sit for a few minutes before wiping it off.
- Scuffs or Scratches: Rub a tiny amount of hair conditioner on scuffs or scratches. Buff it in gently with a soft cloth.
- Ink Stains: Dip a cotton swab in rubbing alcohol and gently rub over the ink mark. Wipe away any residue with a clean cloth.
- Water Stains: Blot water stains instead of wiping. Allow to air dry. If a mark remains, dampen the entire area with a sponge and let it dry evenly.
3. Synthetic Car Seats (Vinyl)
- General Stains: Mix a solution of mild dish soap and warm water. Dampen a cloth or sponge and wipe down the seats. Rinse with a cloth dampened with clean water.
- Difficult Stains (like berry juice, wine): Dip a cloth into a mix of equal parts water and white vinegar. Gently rub the stain. Rinse with a cloth dampened with clean water.
- Sunscreen Stains: Apply a small amount of diluted ammonia to the stain (1 part ammonia to 5 parts water). Rinse with a damp cloth and pat dry.
General Tips for All Car Upholstery Types
- Always Test First: Before applying any cleaning solution, always test a small, inconspicuous area to ensure it doesn’t damage or discolor the upholstery.
- Blot, Don’t Rub: Rubbing can spread the stain or push it deeper into the upholstery. Always blot.
- Tackle Stains Promptly: The sooner you address a stain, the easier it will be to remove.
- Keep a Cleaning Kit in the Car: Assemble a basic kit with cloths, mild soap, water, white vinegar, baking soda, and isopropyl alcohol. Quick access to these tools can help tackle stains as soon as they occur.
Keeping your car’s interior pristine can be a challenge, but knowing how to tackle each stain type can simplify the process. By using the right techniques and products for each upholstery type, you can ensure your car’s seats remain as spotless as the day you drove it off the lot.
When DIY Isn’t Enough: Professional Car Upholstery Cleaning
For deep-set, stubborn, or extensive stains, or simply to give your car a rejuvenating deep clean, consider professional car upholstery cleaning services. These experts possess the equipment and expertise to handle even the toughest of stains. Reach out to specialized car upholstery cleaners in your area to restore your vehicle’s interior to its prime.
Managing Cleaning in Multi-pet Households: Embracing the Furry Chaos with Order
Ah, the joy of multiple pets! Whether it’s the synchronized purring of cats or the harmonious barks of dogs, households with multiple furry companions are filled with love, fun, and—let’s face it—a unique set of messes. Managing cleaning in such vibrant environments requires special attention. Here’s how to embrace the multi-pet household while keeping it clean and fresh.
1. The Hair Everywhere Challenge
- Daily Brushing: Regular grooming reduces the amount of hair pets shed around the house. It’s also a great bonding activity!
- Invest in a Pet-specific Vacuum: Regular vacuums might not cut it. Pet-specific models are designed to handle large amounts of hair and dander.
- Furniture Covers: Easy-to-wash furniture covers can catch hair and protect your sofas and chairs. Opt for covers in colors similar to your pets’ fur for a less noticeable hair appearance.
- Static Solutions: A dryer sheet can pick up stray hairs on surfaces. Rubbing it over upholstery or carpet can help gather the stray fur.
2. The ‘Oops, I Did It Again’ Scenario
- Accident Zones: Identify common accident spots. Use pet gates to restrict access or lay down absorbent pads in these areas.
- Enzymatic Cleaners: For spots that have been soiled, enzymatic cleaners break down pet waste components, effectively removing stains and odors.
- Litter Box Logistics: For multi-cat households, have more litter boxes than you have cats. Regularly scoop, and keep them in various locations around the house.
3. The Toy Tornado
- Regular Cleaning: Dogs and cats leave saliva, food particles, and dander on their toys. Clean soft toys in the washing machine and hard toys with a mild detergent and water.
- Designated Play Areas: Create specific play zones equipped with toys, reducing the sprawl throughout the house.
4. Feeding Frenzy: Keeping Eating Areas Clean
- Placemats: Place washable or wipe-down mats under pet bowls to catch any spills or splashes.
- Elevated Bowls: These can reduce the amount of food and water that gets splashed around.
- Scheduled Feeding: Instead of leaving food out, have set feeding times. This not only helps manage pets’ diets but also reduces the time food is out to attract bugs or get knocked over.
5. Muddy Paws and Outdoor Adventures
- Entryway Stations: Set up an area near the door with towels, pet wipes, and a water bowl to clean off dirty paws and fur before the pets come inside.
- Regular Baths: While not too frequent to dry out their skin, regular baths help reduce the amount of dirt and dander pets introduce into your home.
6. Air Quality Maintenance
- Air Purifiers: Invest in a good air purifier to reduce dander and hair circulating in the air.
- Frequent Filter Changes: If you have HVAC or centralized air conditioning, change filters more frequently than usual to ensure they aren’t clogged with pet hair and dander.
7. Establish Routines and Stick to Them
Consistency is key. Establish daily, weekly, and monthly cleaning routines. For instance, daily grooming, weekly litter changes, and monthly deep-cleaning or washing of pet beddings.
While managing cleaning in a multi-pet household comes with its challenges, it’s entirely doable with the right strategies. Remember, the goal isn’t to create a sterile environment, but a harmonious one where humans and pets can thrive together. Embrace the quirks and messes that come with multiple pets, and find joy in the love-filled chaos.
When Hands Are Full, Seek Professional Help!
Maintaining a multi-pet household can be overwhelming at times. If it becomes too much, or if you need a deep clean, consider professional cleaning services. They’re equipped to handle pet-specific challenges effectively. Connect with trusted cleaning experts in your area for a pet-approved, spotless home.
Cleaning for Wellness: A Holistic Approach to Health and Home
Most of us instinctively appreciate the comfort of a clean space. But beyond the immediate satisfaction of a tidy room or organized desk, cleanliness has profound effects on our overall well-being. From bolstering physical health to nurturing mental clarity, let’s delve into the myriad ways cleaning is intertwined with our holistic wellness.
1. Physical Health Benefits
- Reduced Allergens: Regular cleaning drastically reduces dust mites, pet dander, and mold spores. These allergens can cause respiratory problems, especially for those with asthma or allergies. Vacuuming with HEPA filters, frequently washing bedding, and damp dusting can combat these common allergens.
- Minimized Infections: Regularly disinfecting surfaces, particularly in the bathroom and kitchen, can kill harmful bacteria and viruses, reducing the risk of infectious diseases.
- Improved Air Quality: Keeping your living space clean reduces pollutants and particulate matter in the air, leading to better indoor air quality. Air purifiers, plants, and frequent window-opening can further enhance this.
2. Mental and Emotional Health Rewards
- Clarity and Focus: A cluttered space often leads to a cluttered mind. Organized and clean environments can improve concentration, boost productivity, and reduce distractions.
- Reduced Stress and Fatigue: Physical clutter can be mentally exhausting. Regular cleaning and decluttering can alleviate feelings of stress, making spaces restorative rather than draining.
- Sense of Accomplishment: The act of cleaning can provide a sense of purpose and accomplishment, releasing endorphins, the body’s natural feel-good chemicals.
- Enhanced Creativity: Clean spaces can stimulate the mind, allowing for better creativity and problem-solving.
3. Social and Behavioral Benefits
- Increased Social Interaction: A clean home is more inviting, encouraging social interactions and bonding with friends and family. Positive social interactions are vital for emotional well-being.
- Improved Sleep: A clean and organized sleeping environment often leads to better sleep quality, vital for both physical health and cognitive function.
- Establishment of Beneficial Routines: The habit of cleaning can establish a productive routine, providing structure and a sense of normalcy, especially in chaotic or uncertain times.
4. Enhancing Spiritual and Holistic Well-being
- Mindfulness in Action: Cleaning can become a form of mindfulness meditation, where you are wholly present in the activity, leading to a state of flow and increased awareness.
- Creating Sacred Space: In many cultures, cleanliness is equated to spirituality. A clean environment can serve as a personal sanctuary, a space for reflection, meditation, and connection.
Conclusion
Cleaning for wellness goes beyond superficial tidiness. It is a conscious act of caring for oneself and one’s environment. By understanding and embracing the comprehensive benefits of a clean space, we not only nurture our surroundings but also fortify our mental, physical, and spiritual well-being.
Enrich Your Cleaning Journey with Professional Expertise
While personal cleaning routines are essential, occasional deep cleaning by professionals ensures optimal wellness benefits. Their expertise can tackle areas often overlooked and provide a level of cleanliness that bolsters every aspect of well-being. Connect with trusted cleaning experts in your area to maximize the wellness benefits of your environment.